Episode 144
February 19, 1185, Yashima in Sanuki Province.
The Taira clan, who were protecting Emperor Antoku, were about to face the advancing forces of Minamoto no Yoshitsune.
Fires began to rise one after another from the houses in Mure and Takamatsu, located across from Yashima.
According to the “Azuma Kagami,” Yoshitsune landed in Awa Province early the previous morning and attacked the Taira strongholds that same day. He then pressed on through the night, crossing the border between Awa and Sanuki, and arrived at Yashima.
Yoshitsune was leading a force recorded as numbering just over 150 horsemen.
Compared to the Taira forces guarding Emperor Antoku, it was a small contingent.
However, upon seeing the sudden appearance of the Minamoto forces and the rising black smoke, the Taira assumed a large army was attacking.
Taira no Munemori and others moved Emperor Antoku onto a ship and retreated to the sea.
During this time, Yoshitsune’s forces attacked the imperial residence at Yashima and set the buildings ablaze.
It is said that the black smoke rose into the sky, obscuring the daylight.
However, the Taira soon realized that the Minamoto forces were fewer than they had thought.
They brought their ships back to shore and launched a counterattack.
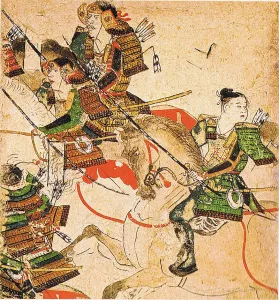
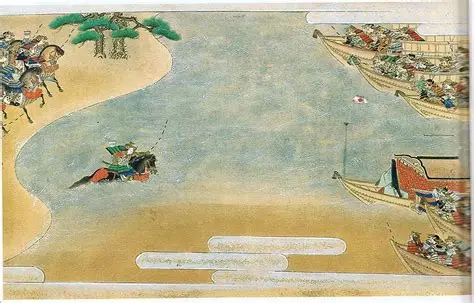
On the beach, Minamoto horsemen drew their bows, while Taira warriors fired arrows from their ships.
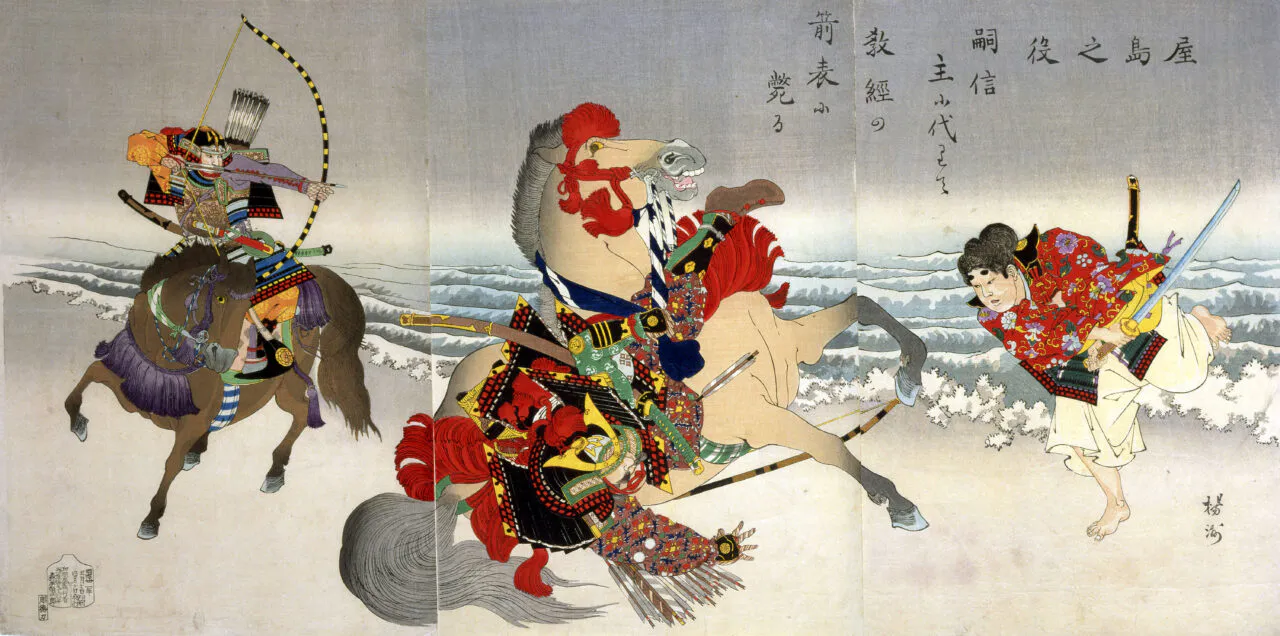
In this battle, Sato Tsugunobu, who served Yoshitsune, was killed in action.
The “Heike Monogatari” recounts that Taira no Noritsune aimed an arrow at Yoshitsune, which Tsugunobu took in his place.
Additionally, the tales of Nasu no Yoichi’s fan target, Akushichibyoe Kagekiyo’s helmet pull, and Yoshitsune’s bow shooting became legendary stories passed down through the ages.
Even after their defeat at Ichinotani, the Taira continued to resist from their base at Yashima, holding Emperor Antoku and the Imperial Regalia.
However, with the burning of their residence in this battle, Munemori and others were forced to retreat to the sea once more.
About a month after the Battle of Yashima.
The final confrontation between the Minamoto and Taira forces took place at Dan-no-ura in Nagato Province.
The Taira Retreat to Yashima After Their Defeat at Ichinotani
On February 7, 1184, the Taira suffered a major defeat at Ichinotani in Settsu Province.
Minamoto no Noriyori’s forces attacked from the east at the Ikuta Forest, while Minamoto no Yoshitsune and others broke through the Taira positions on the western front at Ichinotani.
The Taira lost their defensive line around Fukuhara, and many of their clan’s warriors were killed in action.
Taira no Tadamori, Taira no Atsumori, Taira no Tsunemasa, and Taira no Tomomori lost their lives, and Taira no Kiyomori’s son, Taira no Shigehira, was captured alive by the Minamoto forces.
The Taira clan, having only just regained Fukuhara after their retreat from the capital the previous year, lost it once more.
Munemori, Tomomori, and other surviving generals of the Taira family retreated westward by ship.
However, Emperor Antoku and the Imperial Regalia remained in Taira hands.
The Taira fleet lingered in the Seto Inland Sea, and warriors loyal to the Taira were present in provinces like Sanuki, Awa, and Iyo.
In Kyushu, influential groups like the Harada, Yamaga, and Matsuura clans continued their activities, maintaining strong ties with the Taira.
Even though the Minamoto achieved a great victory at the Battle of Ichinotani, they could not immediately corner the Taira in the western provinces.
The Taira utilized their ships to move among the islands and coastlines of the Seto Inland Sea.
On the other hand, the Minamoto warriors from the eastern provinces needed to secure ships to cross the sea.
Relying on their remaining fleet and western warriors, the Taira continued their resistance from their base at Yashima.
Yashima: The Taira Stronghold
Yashima is located in the eastern part of present-day Takamatsu City, Kagawa Prefecture.
It is a plateau about 292 meters high, with a unique flat top, facing the Seto Inland Sea.
Today, it is connected to the Shikoku mainland, but in the late Heian period, it was an island surrounded by the sea.
On the eastern side of Yashima lies an inlet called Dan-no-ura, with the Mure coast stretching across the water.
The Taira gathered their fleet in this area, ready to confront any enemy approaching Yashima from the sea.
Moreover, Yashima was a convenient location for moving from Sanuki Province to Awa and Iyo Provinces.
In the second year of Juei (1183), after being driven from Kyoto by Minamoto no Yoshinaka’s advance, the Taira attempted to regroup their forces in Kyushu.
However, resistance from figures like Ogata Koreie in Bungo Province prevented them from establishing a stable base around Dazaifu.
Returning to the Seto Inland Sea, they regrouped their forces around Yashima.
A palace was established for Emperor Antoku, and the Taira clan, including Munemori, gathered there.
According to temple traditions, Emperor Antoku stayed at Rokumanji Temple in Mure until the palace was completed.
At Yashima, there was a court for Emperor Antoku, surrounded by the residences of the Taira clan and the positions of their warriors.
A fleet was stationed offshore.
For the Taira, Yashima was a crucial base to maintain their forces in the west and continue their struggle against the Minamoto.
Emperor Antoku and the Imperial Regalia
Emperor Antoku, at Yashima, was eight years old by traditional count.
His father was Emperor Takakura, and his mother was Taira no Tokuko, daughter of Taira no Kiyomori.
Born as Kiyomori’s grandson, he ascended the throne at a young age in the fourth year of Jisho (1180).
By supporting Emperor Antoku, the Taira sought to maintain their position at the core of the court.
During the flight from the capital in the second year of Juei, the Imperial Regalia were also taken to the west.
Meanwhile, in Kyoto, Emperor Go-Toba ascended the throne in August of the same year.
This led to a situation where the Taira court supporting Emperor Antoku and the Kyoto court of Emperor Go-Toba stood side by side.
For Retired Emperor Go-Shirakawa and Minamoto no Yoritomo, reclaiming Emperor Antoku and the Imperial Regalia was a crucial task.
The Azuma Kagami entry for January 6, Genryaku 2, records a letter Yoritomo sent to Noriyori.
In it, Yoritomo urged that Emperor Antoku and the Taira women be received without harm.
Even if the Taira were militarily cornered, Emperor Antoku’s safety had to be ensured.
However, Munemori and others could still board ships with the Emperor and move across the sea.
The Minamoto needed to close in on the Taira fleet to capture Emperor Antoku.
Noriyori Heads to Kyushu, Yoshitsune to Shikoku
In September of Genryaku 1 (1184), Minamoto no Noriyori led a large army westward again.
Noriyori’s forces advanced west along the Sanyo Road and fought the Taira at Fujito in Bizen Province.
It is said that Sasaki Saburo Moritsuna crossed the sea on horseback at Fujito, causing the Taira army to flee.
However, Noriyori’s army continued to struggle.
They faced shortages of provisions and ships.
By January of Genryaku 2, they were stalled near Akamaseki in Nagato Province, and more warriors from the eastern provinces were expressing a desire to return home.
At this point, Usuki Koretaka and Ogata Koreie from Bungo Province provided 82 warships.
With this support, Noriyori’s army was able to cross to Kyushu.
On February 1, they fought Taira warriors like Harada Tanenao at Ashiyahama.
According to the Azuma Kagami, Hojo Yoshitoki, Shimokobe Yukihira, and Shibuya Shigekuni led the charge, defeating the Harada forces.
Meanwhile, Munemori and others were supporting Emperor Antoku at Yashima in Shikoku.
It is said that Taira no Tomomori gathered forces from Kyushu on Hikoshima in Nagato Province to defend the Moji Seki area.
The Genji forces pursued the Taira from multiple directions in the western provinces.
Minamoto no Noriyori was active in the Kyushu area, while Minamoto no Yoshitsune headed towards Yashima in Shikoku.
Yoshitsune Decides to Set Out for Yashima
After the Battle of Ichinotani, Minamoto no Yoshitsune was active in Kyoto.
He was appointed as a kebiishi by the Imperial Court and was involved in the security of Kyoto.
His relationship with Emperor Go-Shirakawa deepened, and he was expected by the court to be the military commander in charge of pursuing the Taira.
In the “Reverse Oar” chapter of the The Tale of the Heike, there is a scene where Yoshitsune visits Emperor Go-Shirakawa and declares his determination to pursue the Taira.
He expressed his concern that the Taira still held power in the western provinces and vowed to pursue them to the ends of the sea.
The Emperor, upon hearing these words, reportedly ordered Yoshitsune to swiftly defeat the Taira.
However, there were concerns about the security of Kyoto in the event of his departure.
According to Gyokuyou, the diary of Kujou Kanezane, Emperor Go-Shirakawa attempted to stop Yoshitsune from setting out.
This was due to concerns that the reduction of warriors in Kyoto would weaken its defenses.
Nevertheless, Yoshitsune did not change his decision to set out.
The Azuma Kagami entry for February 16, Genryaku 2, also records Yoshitsune’s departure.
Takaie Yasukiyo advised that it was not necessary for the general himself to lead the charge.
However, Yoshitsune reportedly replied that he was prepared to sacrifice his life at the front.
Thus, Yoshitsune headed to Settsu Province to prepare ships for crossing to Shikoku.
Kajiwara Kagetoki’s Proposal of the Reverse Oar
The The Tale of the Heike recounts a story of Yoshitsune clashing with Kajiwara Kagetoki before crossing the sea.
This was over the “Reverse Oar.”
At Watanabe no Tsu in Settsu Province, Genji warriors were preparing ships and discussing naval strategies.
It was there that Kajiwara Kagetoki proposed equipping the ships with reverse oars.
A reverse oar is a device that allows oars to be used at both the bow and stern, making it easier to maneuver the ship back and forth.
On land, one can turn a horse to flee from the enemy.
However, a ship cannot change direction quickly.
There was a risk of being attacked and defeated along with the ship if they could not retreat swiftly at sea.
For this reason, Kagetoki sought to prepare reverse oars.
However, Yoshitsune opposed the idea.
He believed that preparing for retreat before even engaging in battle was an ill omen for the journey.
He reportedly said he would proceed with regular oars.
Kagetoki argued that a great general must know when to advance and when to retreat.
On the other hand, Yoshitsune was said to disdain preparations for retreat, placing great importance on winning through attack.
The Tale of the Heike depicts a fierce argument between the two.
However, the detailed progression of this argument is not recorded in the Azuma Kagami‘s account of the campaign.
The conflict over the reverse oar is known as an anecdote illustrating the differing perspectives of Yoshitsune and Kagetoki in military chronicles.
Yoshitsune and Kagetoki continued to serve under Yoritomo, but their relationship later deteriorated.
The Crossing Carried Out Amidst a Storm
When Yoshitsune attempted to set sail, the sea was rough.
According to the Azuma Kagami, on February 18, 1185, the day before Yoshitsune tried to cross the sea, a sudden storm arose, damaging many ships.
The warriors hesitated to set sail, unwilling to launch the ships.
Nevertheless, Yoshitsune decided to proceed with the crossing.
He likely wanted to reach Shikoku before the Taira could detect the attack and strengthen their defenses.
The Azuma Kagami records that Yoshitsune ordered the departure, disregarding the dangers of the wind and waves.
At the hour of the Ox on February 18, five ships set out to sea.
The hour of the Ox corresponds to roughly 1:00 to 3:00 AM today.
The ships reportedly arrived at Tsubakiura in Awa Province at the hour of the Hare.
The hour of the Hare is approximately 5:00 to 7:00 AM.
The Azuma Kagami narrates that the journey, which would normally take three days, was completed in a short time.
However, considering the distance from Settsu to Awa, there are doubts about taking this travel time literally.
It is possible that the records of the departure and arrival dates are misaligned.
Nonetheless, Yoshitsune’s decision to send advance ships in stormy weather, reaching Shikoku ahead of the main fleet, is crucial for understanding the surprise attack on Yashima.
Five Ships and Over 150 Mounted Warriors
The Azuma Kagami states that Yoshitsune crossed the sea with five ships and landed in Awa Province with over 150 mounted warriors.
The figure of 150 mounted warriors on five ships raises points for consideration.
In addition to horses, armor, and provisions, there was a need for captains and sailors to be aboard.
If a large number of mounted warriors were transported on just five ships, vessels of considerable size would have been necessary.
Moreover, the Azuma Kagami entry for March 8 mentions that Yoshitsune’s messenger reported 150 ships for the crossing to Awa, indicating discrepancies in the number of ships within the same text.
It is unclear which number is closer to the actual count of ships, and the precise transport situation remains unknown.
However, the sequence of Yoshitsune crossing to Shikoku ahead of the main fleet and attacking Yashima with a small force is recorded in multiple accounts.
Upon landing in Awa Province, Yoshitsune moved towards Yashima without allowing his troops to rest.
Even after successfully crossing the sea from Settsu, Taira warriors awaited them ahead.
Landing in Awa Province and Kondo Chikahira
The Azuma Kagami records Yoshitsune’s landing site as Tsubakiura in Awa Province.
This location is identified with areas around present-day Tsubakidomari in Anan City, Tokushima Prefecture.
On the other hand, in the ‘Tale of the Heike,’ it is depicted that they landed at Katsuura in Awa Province.
The place names differ between the two texts, leaving room for debate about the actual landing site and route of advance.
Upon landing in Awa, the first thing Minamoto no Yoshitsune sought was a guide familiar with the local geography.
The ‘Azuma Kagami’ introduces a warrior named Kondo Shichishinke.
In the ‘Tale of the Heike,’ he is referred to as Kondo Rokushinke.
Despite the difference in names, both are depicted as individuals knowledgeable about the geography of Awa Province.
In the ‘Tale of the Heike,’ Shinke initially intended to confront Yoshitsune’s landing on the side of the Taira.
However, he ended up following Yoshitsune’s army and reportedly guided them to Yashima.
It is said that Yoshitsune obtained information about the roads of Awa Province and the Taira strongholds from Shinke.
To reach Yashima, they had to cross the mountain paths leading from Awa Province to Sanuki Province.
Moreover, along the way were warriors loyal to the Taira.
Once Yoshitsune secured a guide, he immediately headed north.
Assault on Sakurama-no-suke’s Castle
In Awa Province, Yoshitsune’s forces attacked the stronghold of Sakurama-no-suke.
In the ‘Azuma Kagami,’ he is referred to as Sakuraba-no-suke Yoritō, while in the ‘Tale of the Heike,’ he appears as Sakurama-no-suke Noyori.
Yoritō is considered the brother of Taguchi Nariyoshi, also known as Awa Minbu Shigeno.
The Taguchi clan was a powerful samurai family in Awa Province, supporting the Taira’s naval forces.
Sakurama-no-suke is said to have established a castle in Awa as part of this clan.
According to the ‘Azuma Kagami,’ Yoshitsune attacked Sakuraba-no-suke Yoritō’s castle at Katsuraura.
Yoritō reportedly abandoned the castle and fled.
Meanwhile, the ‘Tale of the Heike’ provides a detailed account of the siege, describing moats and marshes surrounding the castle.
However, the exact location of the castle and the number of defenders remain unclear.
While the ‘Azuma Kagami’ notes Yoritō’s abandonment of the castle, it does not convey how long the intense siege lasted.
After driving out the Taira forces in Awa, Yoshitsune proceeded to Yashima.
Yashima was where Emperor Antoku and Munemori were located.
Yoshitsune aimed to attack this stronghold before the Taira could fully prepare their defenses.
Crossing the Border of Awa and Sanuki Overnight
According to the ‘Azuma Kagami,’ Yoshitsune advanced overnight from February 18 to 19.
He crossed Nakayama, located on the border of Awa and Sanuki Provinces, arriving at the opposite shore of the imperial palace at Yashima by the hour of the dragon on the 19th.
The ‘Tale of the Heike’ describes the route as crossing the Osaka Pass.
Osaka Pass is known today as a mountain path leading from Naruto City in Tokushima Prefecture to Higashikagawa City in Kagawa Prefecture.
Yoshitsune’s forces attacked a Taira stronghold in Awa Province, secured a local guide, and entered the mountains.
They fought during the day and advanced along the mountain paths at night.
If the Taira had learned of the Genji forces’ landing and deployed troops along their route, attacking Yashima would have been difficult.
Yoshitsune did not allow them that time and pressed on to Yashima.
According to the Azuma Kagami, the timeline from landing in Awa Province to attacking Yashima took only about a day.
This rapid advance significantly altered the situation at Yashima.
February 19: Fires Erupt in Mure and Takamatsu
On the morning of February 19, 1185, Yoshitsune’s forces arrived at the opposite shore of Yashima.
The Azuma Kagami states that Yoshitsune set fire to the houses in Mure and Takamatsu.
From Yashima, flames could be seen rising one after another across the shore.
The Tale of the Heike describes how the Taira, mistaking it for an attack by a large Genji force, hurriedly retreated to the sea.
Yoshitsune’s army, according to the Azuma Kagami, consisted of just over 150 horsemen.
The Taira were unable to accurately assess the size of this force.
Suddenly, the Genji army appeared on the opposite shore, setting fire to the surrounding houses.
Munemori and others decided to retreat to the ships to protect Emperor Antoku.
The Azuma Kagami records that the burning of houses in Mure and Takamatsu prompted Emperor Antoku to leave the palace, with Munemori and his clan retreating to the sea.
Meanwhile, Yoshitsune’s forces advanced towards the land base at Yashima.
However, it wasn’t only the Taira positions that were set ablaze.
Mure and Takamatsu were home to residents who were not directly involved in the battle.
Although records are scarce on the number of houses burned and the damage to residents, Yoshitsune’s attack also affected the surrounding villages.
Munemori Moves Emperor Antoku to the Ships
Emperor Antoku was residing in the palace at Yashima.
Munemori and others were living in the western provinces with the emperor, along with Taira warriors and courtiers.
The Genji army approached this palace.
According to the Azuma Kagami, Emperor Antoku left the palace, and Munemori and his clan retreated to the sea.
The Taira possessed many ships.
Even if their land base was attacked, they could distance themselves from the enemy by taking to the sea.
Moreover, they could keep Emperor Antoku away from the Genji army’s attacks.
However, by retreating to the ships, the Taira left fewer soldiers to defend the palace at Yashima.
During this time, Yoshitsune’s forces advanced on land and attacked the palace.
The Tale of the Heike later depicts Munemori regretting his hasty retreat to the ships upon realizing the small size of Yoshitsune’s forces.
The Taira still had enough warriors to mount a counterattack.
Nevertheless, they could not risk endangering Emperor Antoku.
Munemori chose to retreat to the ships, resulting in the Genji army capturing the palace at Yashima.
The Taira Palace Engulfed in Flames
The Azuma Kagami entry for February 19 notes that Yoshitsune’s retainers set fire to the palace at Yashima.
The brothers Sato Tsugunobu and Tadanobu, along with Goto Mototsuna and Motokiyo, set fire to the palace and Munemori’s resting quarters.
Black smoke rose from the buildings.
The Azuma Kagami describes the intensity of the fire as follows.
“Black smoke towers to the heavens, obscuring the light of day.”
It was said that black smoke rose into the sky, covering the daylight.
Even after their crushing defeat at Ichinotani, the Taira clan established a court at Yashima, continuing to support Emperor Antoku.
That imperial residence was consumed by flames.
However, the attacks by Yoshitsune’s forces did not end there.
The Taira fleet remained at sea.
Munemori and Emperor Antoku had also moved onto the ships.
Despite losing the court at Yashima, the Taira still had warriors ready to fight.
Once it was known that Yoshitsune’s forces were small, the Taira moved their ships closer to shore and began a counterattack.
The Genpei Conflict Resumes on the Coast
According to the “Azuma Kagami,” Yoshitsune, accompanied by Tashiro Nobutsuna, Kaneko Ietada, Kaneko Yoichi Chikanori, and Ise Saburo Yonomori, headed for the coast.
The “Heike Monogatari” refers to Ise Saburo as Yoshimori, highlighting differences in name recordings.
The Taira moved their ships closer to shore and began shooting arrows.
The Genji forces also returned fire from the beach.
While the Taira attacked from their ships at sea, Yoshitsune’s forces advanced on horseback, confronting them from land.
The “Azuma Kagami” records that Etchu Jirobei Moritsugu and Kazusa Gorobei Tadami disembarked and set up a position in front of the court gates to fight.
The “Heike Monogatari” also recounts that Etchu Jirobei Moritsugu and others landed and battled the Genji forces.
Though the Taira initially retreated to the sea, they once again landed and attacked Yoshitsune’s forces.
The battle over the Yashima stronghold continued.
During this conflict, Sato Tsugunobu, who served Yoshitsune, was killed in action.
The Sato Brothers Who Followed Yoshitsune from Oshu
Sato Tsugunobu was a warrior with ties to Oshu.
He is referred to as Tsuginobu in the “Heike Monogatari” and as Tsugunobu in the “Azuma Kagami.”
His younger brother was Sato Shirobei Tadanobu.
The Sato brothers were known as a family closely connected to the Oshu Fujiwara clan.
Later genealogies identify their father as Sato Motokazu.
They were a family with ties to the area around present-day Iizaka Town in Fukushima City, Fukushima Prefecture, and held influence in the Shinobu District and other regions.
Yoshitsune went down to Oshu in his youth and spent time under Fujiwara no Hidehira.
After his brother Yoritomo raised an army, he left Oshu to join Yoritomo.
The Sato brothers are said to have followed Yoshitsune, fighting in various battles.
However, the exact time when the brothers became Yoshitsune’s retainers is not clearly documented.
In the Battle of Yashima, both Tsugunobu and Tadanobu joined Yoshitsune’s forces.
It was then that the elder brother, Tsugunobu, was struck by an arrow from the Taira side.
Taira no Noritsune’s Powerful Bow Targeting Yoshitsune
According to the “Heike Monogatari,” Taira no Noritsune was drawing his bow on the Yashima coast.
Tadanori was the son of Taira no Kiyomori’s brother, Taira no Norimori, and the younger brother of Taira no Tomomori, who died in battle at Ichi-no-Tani.
In “The Tale of the Heike,” he is depicted as a master archer among the Taira clan.
It is said that Tadanori aimed his arrows at Minamoto no Yoshitsune from aboard a ship.
Yoshitsune was the commander of the Minamoto forces.
Defeating Yoshitsune would have been a significant victory for the Taira.
Tadanori continued to target Yoshitsune.
However, Yoshitsune was surrounded by warriors like Sato Tsugunobu and Tadanobu.
According to “The Tale of the Heike,” Tsugunobu advanced his horse in front of Yoshitsune and took Tadanori’s arrow.
The arrow pierced through Tsugunobu from his left shoulder to his right side.
Tsugunobu fell from his horse.
However, the detailed account attributing the shot to Tadanori is conveyed through “The Tale of the Heike.”
“The Azuma Kagami” also records Tsugunobu’s death in battle, but does not mention the name of the archer.
The Final Moments of Sato Tsugunobu
According to “The Tale of the Heike,” when Tsugunobu fell, a young retainer of the Taira named Kikuomaru rushed over.
Kikuomaru was in service to Tadanori.
As he approached to take Tsugunobu’s head, his brother Tadanobu drew his bow and shot Kikuomaru.
Kikuomaru was also gravely wounded and reportedly died.
Meanwhile, on the Minamoto side, the injured Tsugunobu was carried to the rear of the camp.
“The Tale of the Heike” depicts Yoshitsune dismounting and approaching Tsugunobu.
When Yoshitsune asked if he had any regrets, Tsugunobu reportedly said that his only regret was not being able to see Yoshitsune rise to greatness.
Furthermore, he expressed that dying in place of his lord at Yashima would be an honor remembered by future generations.
This final conversation is preserved in “The Tale of the Heike.”
“The Azuma Kagami” also notes that Tsugunobu was shot and killed during the battle at Yashima.
It is said that Yoshitsune deeply mourned the death of this loyal retainer.
The Famous Horse Yoshitsune Gave for Tsugunobu
Upon learning of Tsugunobu’s death, Yoshitsune summoned monks to perform his funeral rites.
According to “The Azuma Kagami,” Tsugunobu was buried beneath a pine tree.
Additionally, Yoshitsune gifted a horse to the monks involved in the funeral.
It was a renowned horse known as “Taifu Kuro.”
The horse known as Daifukuro originally belonged to the stables of Emperor Go-Shirakawa and was given to Minamoto no Yoshitsune when he set out for battle.
Yoshitsune cherished this horse greatly.
In honor of Tadamune, he gave his beloved horse to a monk.
The Tale of the Heike also recounts the story of Yoshitsune mourning Tadamune’s death and gifting the prized horse.
Tadamune, who died in battle at Yashima, later became widely known as a loyal retainer who sacrificed himself for Yoshitsune.
In present-day Mure Town, Takamatsu City, there remains a site believed to be Tadamune’s grave.
There is also a stone monument said to mark the grave of Daifukuro, the horse Yoshitsune gifted.
The records of Tadamune’s death in battle and his funeral have been passed down alongside the historical sites at Yashima.
The Heike’s Counterattack Upon Learning of the Small Force
Even after the imperial palace at Yashima was burned, the Heike forces maintained their fleet.
The Tale of the Heike describes how Munemori and others regretted retreating to the sea upon discovering the small size of Yoshitsune’s army.
It is said that Yoshitsune’s forces appeared to number only seventy to eighty cavalrymen.
The Azuma Kagami records the number of troops landing in Awa Province as over 150, showing a discrepancy in the figures.
However, both accounts agree that Yoshitsune led a small force.
Meanwhile, the Heike still had many warriors and ships at their disposal.
Once they realized the Genji’s numbers were few, the Heike forces came ashore again to launch an attack.
Although Yoshitsune’s army succeeded in burning the imperial palace, they could not destroy the Heike fleet on the spot.
The Heike also failed to reclaim their positions on land, and the battle continued along the shore.
Amidst this conflict, the Tale of the Heike recounts the story of Nasu no Yoichi’s famous arrow shot at the fan.
The Fan Raised on the Heike’s Ship
According to the eleventh volume of the Tale of the Heike, “Nasu no Yoichi,” on the evening of a day when the battle at Yashima continued, a small Heike boat approached the shore.
It was a beautifully adorned vessel.
A young lady-in-waiting appeared from the boat.
She was about eighteen or nineteen years old.
The lady-in-waiting raised a fan at the edge of the boat and beckoned towards the shore.
The fan was red and depicted a rising sun, it is said.
The Genji warriors watched the scene unfold.
With the fan raised on the small boat at sea, she beckoned to the Genji.
The Heike seemed to be testing the Genji’s archery skills.
Yoshitsune then sought a warrior who could shoot the fan.
However, the target was a small boat swaying on the waves.
The wind would move the boat and change the position of the fan.
Missing the shot would bring dishonor to the Genji.
It was then that Nasu no Yoichi was called upon.
The Young Warrior of Shimotsuke Province, Nasu no Yoichi
Nasu no Yoichi was a samurai known as a member of the Nasu clan from Shimotsuke Province.
In “The Tale of the Heike,” he is referred to as Yoichi Munetaka, the son of Nasu Taro Suketaka.
The Nasu clan held power in the Nasu region, which corresponds to the northern part of present-day Tochigi Prefecture.
Yoichi is famed as a master archer.
According to “The Tale of the Heike,” he was around twenty years old during the Battle of Yashima.
However, there are few reliable records about Yoichi’s life, and much of what is known relies on later genealogies and legends.
Yoichi was ordered by Yoshitsune to shoot a fan, but it is said that he initially declined.
Missing the shot would bring shame to the Genji side.
He reportedly requested that the task be given to someone more certain to succeed.
However, Yoshitsune did not allow him to refuse.
He is said to have scolded Yoichi, telling him to return to Kamakura if he would not follow orders.
Yoichi then refrained from further refusal and stepped forward to the shore with his bow.
Aiming at the Fan Amidst the Waves
According to “The Tale of the Heike,” Yoichi rode his horse into the sea.
The small boat with the fan was floating amidst the waves offshore.
The wind blew, causing the boat to sway up and down.
The fan was also buffeted by the wind, never staying in one place.
Yoichi readied his bow but could not shoot immediately.
It is said that he closed his eyes and prayed to the gods and Buddha.
“Namu Hachiman Daibosatsu”
Yoichi prayed to Hachiman Daibosatsu and the deities of his homeland.
It is said that he was prepared to break his bow and commit suicide if he missed the shot.
Soon, the wind calmed a little, and the fan’s movement lessened.
Yoichi nocked a whistling arrow and drew his bow to the fullest.
Then he released the arrow.
According to “The Tale of the Heike,” the arrow struck near the center of the fan.
The fan soared into the air and was blown into the sea by the spring breeze.
The Taira warriors beat the sides of their boats in admiration.
The Genji warriors also beat their quivers and cheered, as the story goes.
This moment, where both sides praised the archery skills of a single young warrior, became famous for generations to come.
The Man Shot After the Fan
“The Tale of the Heike” also records what happened after the fan was shot down.
From the Taira side, a man appeared, having witnessed Yoichi’s remarkable shot.
The man advanced to where the fan had been and began to dance.
He seemed moved by the Genji’s archery skills, as the story goes.
However, Yoshitsune reportedly ordered Yoichi to shoot the man as well.
Yoichi once again drew his bow and shot the man down.
The Taira, who had been cheering, suddenly fell silent.
Meanwhile, the Genji cheered again, though “The Tale of the Heike” notes that some among them felt it was a pitiful act.
When the fan was shot down, both armies praised Yoichi’s skill.
Immediately afterward, a man fell to an arrow.
The Tale of the Heike depicts these two scenes in succession.
The story of Nasu no Yoichi’s fan target became widely known through later paintings, Noh, and Kabuki.
However, this anecdote does not appear in the Azuma Kagami‘s account of the Battle of Yashima.
There are few contemporary records that confirm Yoichi actually shot down the fan.
The fan target is a famous scene from the Battle of Yashima as conveyed by the Tale of the Heike.
Akunoshichibyoe Kagekiyo’s Helmet Pull
The Battle of Yashima also features Akunoshichibyoe Kagekiyo, known as a valiant warrior on the Taira side.
Kagekiyo is said to be a member of the Fujiwara clan and a samurai who served the Taira.
The Tale of the Heike recounts that Kagekiyo fought against the Genji warrior Miho no Juro.
Miho no Juro was shot off his horse.
Kagekiyo then approached with a long sword.
Miho no Juro tried to escape, but Kagekiyo grabbed the shikoro of his helmet.
The shikoro is the part of the helmet that hangs down to protect the nape of the neck.
Kagekiyo pulled with all his might.
However, the shikoro tore off, and Miho no Juro managed to escape.
Kagekiyo is said to have held up the torn shikoro and shouted his name loudly.
This scene is later known as “Kagekiyo’s Helmet Pull.”
The detailed account of this duel is recorded in the Tale of the Heike, but not in the Azuma Kagami‘s account of the Battle of Yashima.
Kagekiyo continued to be featured in Noh and Kabuki, celebrated as a valiant warrior of the Taira.
Yoshitsune’s Bow Lost to the Sea
The Battle of Yashima also left behind an anecdote involving Yoshitsune himself.
This is known as “The Bow Lost to the Sea.”
According to the Tale of the Heike, when the Taira forces attacked the shore again, Yoshitsune advanced on horseback to fight.
The Taira warriors on the ships tried to pull the Genji warriors closer using grappling hooks.
During the battle, Yoshitsune accidentally dropped his bow into the sea.
His fellow warriors advised him to abandon the bow and retreat.
However, Yoshitsune advanced his horse and used a whip to try to retrieve the floating bow.
There was a risk of being shot by arrows from the nearby enemy ships.
Yet, Yoshitsune is said to have retrieved the bow.
His fellow warriors asked why he risked his life to retrieve the bow.
Yoshitsune reportedly replied that it was not because he valued the bow itself.
His bow was not particularly strong.
If the Taira had picked it up and mocked the Genji leader’s bow as being so weak, that would have been shameful.
The Tale of the Heike portrays Yoshitsune as retrieving the bow to protect his honor.
This story of the arrow is not recorded in the ‘Azuma Kagami’.
However, as an anecdote conveying Yoshitsune’s actions on the battlefield, it became widely known in later generations.
Reasons for Yoshitsune’s Successful Surprise Attack
A major factor in Yoshitsune’s victory at the Battle of Yashima was the speed of his advance.
According to the ‘Azuma Kagami’, Yoshitsune landed in Awa Province on February 18 and reached the opposite shore of Yashima by the following day, the 19th.
During that time, he attacked the base of Sakuraba Sukeyoshi of the Taira side, secured local guides, and crossed the mountains.
He approached Yashima before the Taira forces could deploy troops along the route and fortify their defenses.
Moreover, instead of launching a frontal attack on the Taira fleet from the sea, Yoshitsune approached by land from Awa.
The Taira had many ships in the Seto Inland Sea and excelled in naval battles.
However, after landing on Shikoku, Yoshitsune’s forces appeared on the opposite shore of Yashima via mountain paths.
Furthermore, they set fire to houses in Mure and Takamatsu, causing confusion among the Taira forces.
Munemori and others retreated to the ships to protect Emperor Antoku, losing their position on land.
During this time, Yoshitsune’s forces burned down the buildings.
However, the Taira retained their fleet and retreated to the sea.
They continued to fight near the shore, managing to kill Sato Tsugunobu, among other actions, showing they still had the strength to counterattack.
What Yoshitsune captured was the Taira’s base at Yashima, where they had brought Emperor Antoku.
He was unable to capture Munemori or Emperor Antoku, and the Taira fleet remained intact.
The Taira would continue to retreat further west while moving at sea.
The Taira’s Missed Opportunity for a Night Attack
According to the ‘Heike Monogatari’, on the night of the battle at Yashima, the Genji warriors were exhausted.
They had crossed the stormy sea, fought in Awa Province, and advanced over mountains to Yashima.
Combat continued on the coast afterwards.
The warriors were said to have slept using their armor and helmets as pillows.
It is said that Yoshitsune and Ise Saburo Yoshimori were on alert for a night attack by the enemy.
On the other hand, there is a story that the Taira also considered a night attack.
Kiyomori and others attempted to advance the attack, but disputes over the vanguard position among the warriors led to a missed opportunity, as depicted in the ‘Heike Monogatari’.
However, the detailed course of this night attack plan is based on war tales.
The ‘Azuma Kagami’ does not contain any specific articles about the Taira planning a large-scale night attack.
The Taira continued to maintain their fleet at sea.
Yoshitsune did not cease his pursuit and advanced his forces towards the Shido area east of Yashima.
Pursuit to Shido on February 21
The ‘Azuma Kagami’ entry for February 21, Genryaku 2, notes that the Taira forces, having retreated from Yashima, took refuge at a temple in Shido in Sanuki Province.
Shido corresponds to the area around present-day Sanuki City, Kagawa Prefecture.
Located east of Yashima, it is a region facing the Seto Inland Sea.
It is said that Yoshitsune led 80 horsemen towards Shido.
In the eleventh volume of ‘The Tale of the Heike’, in the section titled “The Battle of Shido”, it is depicted that Minamoto no Yoshitsune selected over 80 horsemen to pursue the enemy.
The Taira forces, aware of Yoshitsune’s small numbers, attempted to land again to fight.
However, when reinforcements for the Genji appeared, the Taira assumed a larger force was approaching and retreated back to their ships.
While the detailed account of this battle comes from ‘The Tale of the Heike’, Yoshitsune’s pursuit towards Shido is also noted in the ‘Azuma Kagami’.
After losing their stronghold at Yashima, the Taira were pursued by the Genji forces at Shido as well.
It was around this time that the allegiance of the samurai in Shikoku, who had been following the Taira, began to shift.
The Surrender of Tanai Saemon-no-jō
According to the ‘Azuma Kagami’ entry for February 21st, Tanai Saemon-no-jō of the Taira faction surrendered to Yoshitsune.
Tanai Saemon-no-jō was known as a member of the Awa Minbu Shigeno clan.
In ‘The Tale of the Heike’, he appears under the name Tanai Saemon Kyōnō.
Kyōnō is said to have fought against the Kōno clan of Iyo Province on behalf of the Taira.
After the defeat at Yashima, the Taira’s influence in Shikoku began to wane.
‘The Tale of the Heike’ recounts that Ise Saburō Yoshimori approached Kyōnō and convinced him to surrender by spreading false information that the Taira had been annihilated.
However, the detailed process of this persuasion is a narrative from the war tales.
What can be confirmed from the ‘Azuma Kagami’ is that Tanai Saemon-no-jō defected to Yoshitsune’s side.
The defection of a prominent samurai who had been loyal to the Taira to Yoshitsune’s side also affected the power dynamics in Shikoku.
Having lost Yashima, the Taira found it increasingly difficult to gain support from the surrounding samurai.
Kōno Michinobu Joins with Thirty Warships
On the same day, February 21st, the ‘Azuma Kagami’ also records that Kōno Shirō Michinobu from Iyo Province joined Yoshitsune’s forces.
Kōno Michinobu was a prominent warrior of the Kōno clan, based in Iyo Province.
The Kōno clan was involved in maritime activities in the Seto Inland Sea, leading fleets of ships.
Michinobu had long been sympathetic to the Genji cause and opposed the Taira.
At this time, Michinobu joined Yoshitsune’s forces with a fleet of 30 warships.
Yoshitsune had initially crossed to Awa with a small advance fleet and succeeded in burning the palace at Yashima.
However, to pursue the Taira fleet, which had retreated to the sea, more ships were needed.
With the support of Kōno Michinobu, Yoshitsune’s forces gained new maritime strength.
Meanwhile, the Taira lost an important stronghold in Shikoku, and their allied samurai continued to dwindle.
After the Battle of Yashima, the Genji gathered fleets to pursue the retreating Taira to the west.
Arrival of Kajiwara Kagetoki and Over 140 Ships
On February 22nd, Genryaku 2, Kajiwara Kagetoki and other warriors from the eastern provinces arrived at Yashima.
The ‘Azuma Kagami’ notes that their fleet consisted of over 140 ships.
Kagetoki was a prominent samurai who served Yoritomo and participated in battles such as the Battle of Ichi-no-Tani.
In “The Tale of the Heike,” he is portrayed as a figure who clashed with Yoshitsune over the reverse oar strategy before crossing the sea.
Kagetoki and his group arrived at Yashima three days after Yoshitsune had set the imperial palace ablaze.
By then, Yoshitsune had already attacked Yashima and was pursuing the enemy towards the Shido area.
“The Tale of the Heike” also recounts an anecdote where Yoshitsune sarcastically remarked on Kagetoki’s delayed arrival.
However, this conversation is from a military chronicle.
The “Azuma Kagami” records that Kagetoki’s fleet arrived late at Yashima.
A separate fleet from Yoshitsune’s vanguard had reached Shikoku around this time.
The Genji forces were also joined by the fleet of Kono Michinobu.
Having driven the Heike from Yashima, Yoshitsune was now gathering forces for a naval pursuit.
The Heike Retreat West After Losing Yashima
With their defeat at Yashima, the Heike lost the imperial palace where they had been sheltering Emperor Antoku.
Munemori and others took to the ships and retreated further west.
“The Tale of the Heike” describes the Heike being pursued at Shido, wandering aimlessly at sea.
However, Taira no Tomomori’s forces remained on Hikoshima in Nagato Province.
The Heike gathered their fleet around Hikoshima, preparing for a final battle.
In Kyushu, there were still samurai like Yamaga Hideto and the Matsuura clan who supported the Heike.
The Heike still possessed naval forces capable of fighting at sea.
However, with the loss of both Fukuhara and Yashima, they were rapidly losing key land bases.
In Shikoku, some samurai surrendered to Yoshitsune, and the Kono clan of Iyo Province joined the Genji.
Meanwhile, Noriyori’s army continued to pursue the Heike forces in Kyushu.
The remaining Heike forces in the western provinces began to gather towards the Kanmon Straits in Nagato Province.
The Final Battlefield, Dan-no-ura
On March 24, 1185, the Genji and Heike forces faced off for their final battle at Dan-no-ura in Nagato Province.
Dan-no-ura is located near present-day Shimonoseki City in Yamaguchi Prefecture, at the Kanmon Straits.
There is another place named Dan-no-ura at the eastern foot of Yashima, but it is different from the Dan-no-ura in Nagato Province where the final sea battle took place.
The Heike gathered western naval forces, including Yamaga Hideto and the Matsuura clan, to fight the Genji.
Yoshitsune’s forces were joined by the fleet of Kono Michinobu, leading to fierce battles at sea.
In the end, the Genji emerged victorious.
Emperor Antoku drowned in the sea, and many Heike warriors lost their lives.
Taira no Tomomori and Taira no Norimori also met their end in this battle.
Munemori and his son Kiyomune were captured alive.
The Taira clan met its end here.
This occurred about a month after the Battle of Yashima.
After their defeat at Ichinotani, the Taira retreated to Yashima. When they lost the imperial palace there, they made their final stand against the Minamoto forces at sea in Nagato Province.
The Legend of the Imperial Palace at Antoku Tenno Shrine
In present-day Yashima Higashimachi, Takamatsu City, the Antoku Tenno Shrine remains.
This shrine is said to be the site where Emperor Antoku’s imperial palace was located during the Battle of Yashima.
In the second year of Juei, the Taira moved their base to Yashima, bringing Emperor Antoku with them.
On February 19, 1185, Yoshitsune’s forces attacked and set fire to the palace, according to records.
The current Antoku Tenno Shrine is known as a place that marks the site of the former imperial residence.
However, detailed records of the palace’s exact size and layout do not survive.
The current shrine building is not the original structure from that time.
Additionally, Yashima is designated as a national historic site.
It was designated on November 10, 1934, and the historic site includes the ancient Yashima Castle, Yashima Temple, and the old battlefields of the Genpei War.
At the eastern foot of Yashima, there are also stone monuments related to Sato Tsugunobu and Kikuomaru.
The Graves of Sato Tsugunobu and Kikuomaru
In Mure Town, Takamatsu City, there is a site said to be the grave of Sato Tsugunobu.
Tsugunobu served Yoshitsune and was killed in action during the Battle of Yashima.
The “Azuma Kagami” also records the circumstances of his death and burial.
At the current gravesite, there remains a stone monument erected by Matsudaira Yorishige, who became the lord of the Takamatsu Domain during the Edo period.
According to Takamatsu City’s cultural heritage materials, Matsudaira Yorishige erected a new marker stone in 1643.
Later, in 1645, when a pond was constructed, the grave was moved to its current location.
In 1931, Tsugunobu’s descendants carried out extensive renovations of the gravesite.
There is also a stone pagoda said to be the grave of Daibu Kuro, a gift from Yoshitsune during Tsugunobu’s funeral.
Meanwhile, at the eastern foot of Yashima, there is a site said to be the grave of Kikuomaru, a member of the Taira side.
According to the “Heike Monogatari,” Kikuomaru was a young retainer serving Kiyomori.
He was killed by Yoshitsune’s brother Tadanobu while attempting to take Tsugunobu’s head.
The details of Kikuomaru’s last moments are conveyed through the “Heike Monogatari,” but there are few contemporary records to confirm the actual burial site.
Nevertheless, Yashima retains places commemorating both Tsugunobu of the Minamoto side and Kikuomaru of the Taira side.
Inori Rock and Komadate Rock
In Mure Town, Takamatsu City, across from Yashima, there are historical sites related to Nasu no Yoichi’s famous fan target.
These are Inori Rock and Komadate Rock.
Inori Rock is said to be the place where Yoichi prayed to the gods and Buddhas before shooting the fan.
Komadate Rock is believed to be where Yoichi stopped his horse to aim at the fan on the sea.
Komadate Rock is known as a rock that appears when the tide recedes.
In this area, there is a place said to be where Yoshitsune dropped his bow into the sea.
Additionally, there are sites linked to the legend of Kagekiyo’s helmet-pulling.
These are historical sites associated with anecdotes from the The Tale of the Heike.
It is difficult to pinpoint exactly where Yoichi shot his arrow or where Yoshitsune dropped his bow.
However, the story of the Battle of Yashima is passed down along with the rocks, place names, and monuments that remain in present-day Takamatsu City.
Memories of the Genpei War Preserved at Yashima
On February 19, 1185, Yoshitsune launched an attack on Yashima.
According to the Azuma Kagami, Yoshitsune crossed to Awa Province with a small number of ships, gained a local guide, and crossed the mountain paths.
He then appeared on the opposite shore of Yashima and set fire to the houses in Mure and Takamatsu.
Munemori and others moved Emperor Antoku onto a ship and retreated to the sea.
Meanwhile, Yoshitsune’s forces burned the palace at Yashima.
However, the Taira forces counterattacked, and fighting continued along the coast.
During this, Sato Tsugunobu was killed in action.
The The Tale of the Heike recounts stories of Tsugunobu taking an arrow for Yoshitsune, Nasu no Yoichi’s fan target, Kagekiyo’s helmet-pulling, and Yoshitsune’s bow-dropping.
After the battle, Yoshitsune pursued the Taira who had retreated towards Shido.
Tanai Saemon-no-jo surrendered, and Kono Michinobu joined Yoshitsune’s side with 30 warships.
Furthermore, Kajiwara Kagetoki and others arrived at Yashima with a fleet of over 140 ships.
Though Yoshitsune could not capture Emperor Antoku or Munemori, he succeeded in driving the Taira from Yashima.
The Taira, maintaining their fleet, moved towards Nagato, preparing for the final showdown.
That battlefield was to be Dan-no-ura.
About a month after the Battle of Yashima, the Genpei forces clashed at the Strait of Shimonoseki.
The palace burned at Yashima was where the Taira had brought Emperor Antoku, seeking to regroup in the western provinces.
Having lost it, the Taira retreated further west into the sea.
Today, at the eastern base of Yashima, the Ankokuten Shrine remains, along with historical sites related to Sato Tsugunobu and Kikuomaru.
Across the shore in Mure, there are places associated with Nasu no Yoichi’s prayer rock and Komadate rock, as well as Yoshitsune’s bow-dropping.
Yashima, once home to the Taira palace, and the opposite shore where Yoshitsune launched his attack.
Now connected to the mainland of Shikoku, the eastern base of Yashima preserves the records and legends of the battles fought by the Genpei forces.